Master Flight Simulator Controls: Pro Tips for Realistic Aviation Experience
Flight simulation has evolved into a sophisticated discipline that mirrors real-world aviation operations with remarkable precision. Whether you’re a casual enthusiast exploring virtual skies or an aspiring pilot preparing for actual flight training, mastering flight simulator controls is essential for achieving authentic flight experiences. The complexity of modern flight simulators demands understanding not just which buttons to press, but why each control input matters and how professional pilots utilize these systems in actual aircraft.
The journey from novice to proficient simulator pilot requires patience, structured learning, and hands-on practice with various control systems. This comprehensive guide explores the fundamental and advanced techniques that will elevate your flight simulation skills, enhance your understanding of aircraft systems, and prepare you for more sophisticated aviation challenges. From basic stick and throttle management to advanced autopilot configurations, we’ll cover everything you need to operate flight simulators like a true professional aviator.

Understanding Your Control Setup
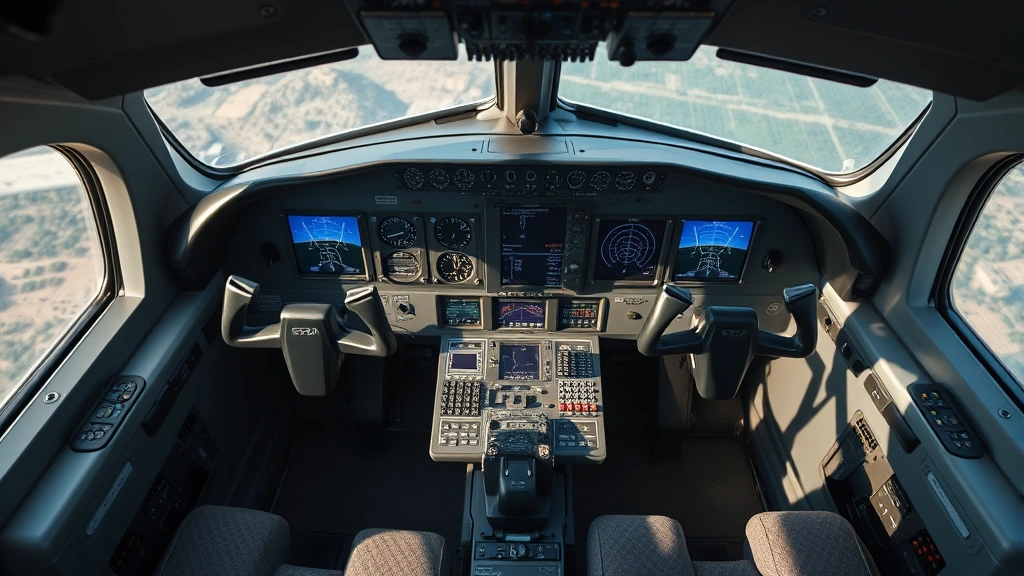
The foundation of mastering flight simulator controls begins with selecting and configuring appropriate hardware. Your control setup directly impacts your ability to execute precise maneuvers and maintain smooth aircraft control throughout your flights. The most common configurations include yoke-based systems, sidestick controllers, and traditional joystick setups, each offering distinct advantages depending on your simulation goals and aircraft preferences.
Yoke controllers provide the most realistic experience for general aviation and commercial aircraft operations. They replicate the physical control column found in actual cockpits, offering intuitive pitch and roll inputs that translate naturally from real-world flying principles. When configuring your yoke, ensure the sensitivity settings match your aircraft type—lighter aircraft require more responsive inputs, while larger transport category aircraft benefit from reduced sensitivity to prevent over-control.
Calibration is absolutely critical before beginning any serious flight simulation session. Most quality flight simulators offer comprehensive calibration tools that allow you to establish neutral positions, define control ranges, and set dead zones that prevent unwanted drift. Spend time in your simulator’s calibration menu adjusting these parameters until your control inputs feel natural and responsive. Poor calibration leads to constant trim corrections, unintended pitch changes, and frustration during critical flight phases.
Beyond primary flight controls, invest in quality throttle quadrants that include separate throttle, propeller pitch, and mixture controls. These components transform your simulation experience from arcade-like flying to realistic systems management. Understanding how to operate these controls properly is essential for mastering various aircraft types and developing genuine pilot skills.
Mastering Primary Flight Controls
The three primary flight control axes—pitch, roll, and yaw—form the foundation of aircraft control in any flight simulator. Pitch control, managed through forward and backward stick movements, governs the aircraft’s nose position relative to the horizon. Smooth, deliberate pitch inputs prevent overshooting and maintain stable flight attitudes. Many beginners make the mistake of using excessive pitch inputs; professional pilots prefer small, continuous corrections that gradually adjust the aircraft’s flight path.
Roll control, executed through left and right stick movements, banks the aircraft and initiates turns. Coordinated rolling inputs combined with appropriate yaw control create smooth, realistic turns that mirror actual aircraft handling. Practice banking to various angles—15 degrees for shallow turns, 25-30 degrees for standard rate turns, and 45+ degrees for steep maneuvering. Each bank angle requires different pitch compensation to maintain altitude during the turn.
Yaw control through rudder inputs prevents the aircraft from slipping or skidding during turns and coordinated flight. Many simulator pilots neglect proper rudder technique, relying exclusively on ailerons and elevators. However, coordinated flight—where rudder, aileron, and elevator inputs work together harmoniously—is essential for realistic flying. Use the rudder pedals to keep the aircraft balanced, particularly during turns and while compensating for crosswind conditions.
Developing muscle memory for these controls requires dedicated practice. Spend time performing basic maneuvers: straight and level flight, shallow turns, climbs, and descents. Focus on smoothness rather than speed; jerky control inputs create unstable flight conditions and poor training habits. Many flight training professionals recommend practicing Dutch rolls, steep turns, and slow flight to develop genuine proficiency with primary controls.
If you’re preparing for actual flight training, visit our guide on airlines key information and tips for travelers to understand how simulator time integrates with actual pilot certification requirements. Flight schools recognize quality simulator practice as valuable training preparation.
Advanced Throttle and Power Management
Power management represents one of the most critical yet overlooked aspects of flight simulation. Unlike video games where throttle functions as a simple speed control, realistic flight simulators demand understanding engine dynamics, fuel mixture, and propeller pitch coordination. Learning proper power management transforms your simulator experience into genuine pilot training.
For piston-engine aircraft, the throttle controls engine power output measured in horsepower. Smooth throttle inputs prevent shock-cooling engine damage and maintain consistent climb performance. When reducing power, do so gradually—sudden throttle reductions can crack engine cylinders in real aircraft, and quality flight simulators model these effects. Practice establishing specific power settings for cruise, climb, and descent phases, then maintaining those settings precisely using trim adjustments rather than constant throttle manipulation.
Propeller pitch control, available on complex aircraft, allows optimization of engine efficiency across different flight regimes. In climb, increase propeller RPM to maintain engine speed while reducing manifold pressure. During cruise, reduce RPM to appropriate values—typically 1800-2000 RPM depending on aircraft type—which improves fuel economy and reduces noise. Mastering propeller pitch control is essential for realistic operations and demonstrates genuine pilot knowledge.
Mixture control represents perhaps the most underutilized flight simulator feature. The mixture lever controls fuel-to-air ratio entering the engine. As altitude increases, the air becomes thinner, requiring progressive mixture adjustments to maintain engine performance. Begin leaning the mixture gradually during climb, and fully lean it for high-altitude cruise operations. Improper mixture management causes rough engine operation, excessive fuel consumption, and potential engine failure in realistic flight simulators.
Understanding aircraft performance charts and calculating appropriate power settings for various conditions separates casual simulator pilots from serious aviators. Before each flight, determine required climb power, cruise power, and descent power based on aircraft weight, temperature, and altitude conditions. This preparation mirrors real-world pilot operations and significantly improves flight quality and realism.
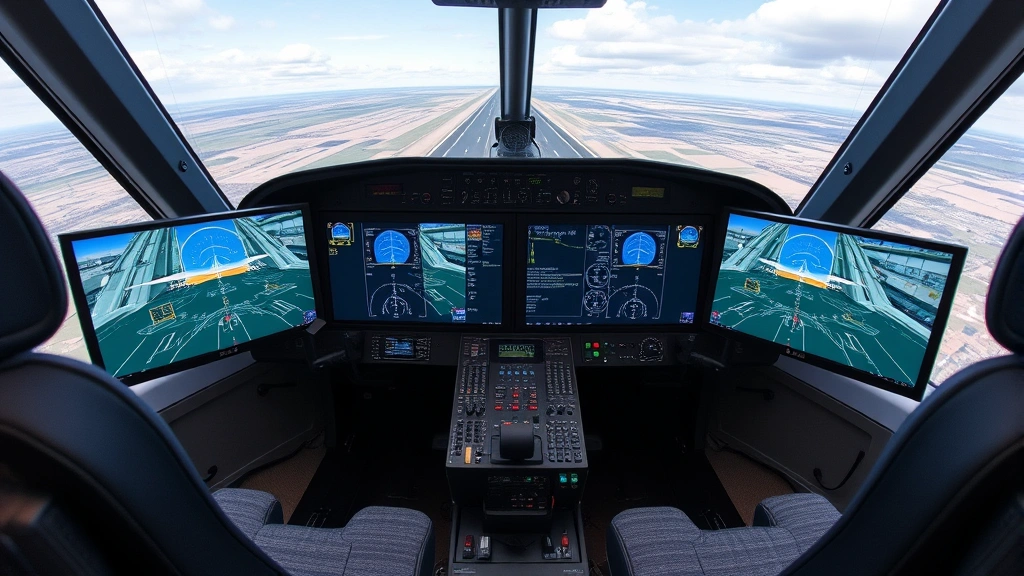
Autopilot Systems and Navigation
Modern flight simulators include sophisticated autopilot systems that replicate actual aircraft automation. Learning to operate autopilot properly is essential for long-distance flights and demonstrates knowledge of real commercial aviation operations. However, autopilot mastery requires understanding when to use automation and when manual control is appropriate.
The altitude hold mode maintains your current altitude automatically, freeing you to manage other systems or simply relax during cruise phases. Engage altitude hold after establishing your desired cruise altitude and trimming the aircraft for stable flight. The autopilot then makes small pitch adjustments to maintain that altitude as external factors like temperature and pressure change.
Heading hold mode maintains your current magnetic heading, useful for straight-line navigation between waypoints. For more advanced navigation, use navigation mode, which couples your autopilot to ground-based navigation aids or GPS waypoints. This mode automatically calculates required heading corrections and follows your planned flight path precisely. Understanding navigation mode is crucial for executing realistic instrument approaches and long-distance flights.
Approach mode activates during landing phases, typically capturing and following instrument landing system (ILS) signals. This mode commands pitch and roll inputs to align your aircraft with the runway centerline and glide slope. To use approach mode effectively, ensure your navigation equipment is properly tuned to the destination runway’s ILS frequency, and engage approach mode only when established on the approach course.
Vertical speed mode allows setting a specific climb or descent rate—for example, 500 feet per minute descent. The autopilot maintains this descent rate by adjusting pitch as needed. This mode proves invaluable for managing descent profiles and maintaining air traffic control clearances that specify descent rates.
While autopilot automation is powerful, remember that real pilots maintain command authority and monitor autopilot performance continuously. Practice hand-flying approaches and landings regularly, as over-reliance on automation degrades manual control skills. Many flight training professionals recommend disabling autopilot during practice sessions to maintain proficiency with direct aircraft control.
Landing Gear and Flap Operations
Proper landing gear and flap management is essential for safe flight operations and realistic performance modeling. These systems significantly affect aircraft handling, performance, and fuel efficiency, and their operation must be timed precisely with flight phase transitions.
Landing gear extension and retraction significantly impacts aircraft performance. Gear-up operations reduce drag substantially, improving climb performance and cruise speed. However, landing gear must remain extended during approach and landing phases. Establish a habit pattern: after reaching a safe altitude and confirming a stable climb, raise the landing gear. Conversely, lower landing gear when descending below 2000 feet or when beginning descent to your destination airport, whichever occurs first.
Flap management requires careful attention to airspeed restrictions. Each flap position has maximum allowable speeds—typically 250 knots at 10 degrees, 200 knots at 20 degrees, and 150-170 knots at full extension, depending on aircraft type. Extending flaps beyond maximum allowable speed can damage the flap system. Use flaps progressively: initial extension during descent reduces altitude loss; additional extension during approach increases drag and steepens descent without excessive speed gain; full flap extension during landing approach provides maximum lift at low speeds.
Understanding the performance benefits of flap deployment improves flight management significantly. Initial flap extension provides lift increase without excessive drag, allowing altitude maintenance or gentle climbs at reduced throttle. Additional flap extension increases drag substantially, enabling steep descents while maintaining safe airspeeds. Full flaps generate maximum lift, enabling short-field operations and steep final approaches.
Practice smooth flap transitions during your training flights. Extend flaps gradually, allowing the aircraft to stabilize at each configuration before additional extension. Abrupt flap deployment creates sudden pitch changes and requires significant trim corrections. Smooth, deliberate flap management maintains stable flight attitudes throughout the descent and approach phases.
Trim Controls and Aircraft Balance
Trim controls represent the most important yet frequently misunderstood flight simulator feature. Proper trim usage eliminates constant control pressure requirements and enables stable, hands-off flight when desired. Understanding trim fundamentally changes your flight simulation experience and demonstrates genuine pilot knowledge.
Pitch trim adjusts the elevator’s neutral position, reducing or eliminating required control stick pressure to maintain desired flight attitudes. After establishing cruise altitude and desired pitch attitude, apply pitch trim until the aircraft maintains that attitude without any control stick pressure. You should be able to remove your hands from the stick temporarily and have the aircraft maintain stable flight. This trim setting remains valid until significant speed or configuration changes occur.
Roll trim corrects any tendency for the aircraft to drift to one side without control input. After establishing level flight with wings level, apply roll trim until the aircraft maintains wings level without aileron input. Properly trimmed aircraft fly more smoothly, require less pilot workload, and demonstrate professional-level flying technique.
Yaw trim, available in most aircraft, corrects any tendency toward coordinated flight degradation. If the aircraft requires continuous rudder input to maintain coordinated flight, apply yaw trim to eliminate this requirement. Properly trimmed aircraft feel balanced and responsive, enhancing the overall flying experience.
Trim management during flight phase transitions is crucial. As you reduce throttle for descent, apply nose-down pitch trim progressively to prevent constant control pressure. As you extend flaps during approach, apply additional nose-up pitch trim to compensate for pitch-down effects. By the time you’re on final approach with full flaps, the aircraft should require minimal control inputs to maintain desired flight path.
Many flight simulators include automatic trim features that adjust trim based on control inputs. While convenient, these automatic systems prevent development of proper trim technique. Disable automatic trim in your simulator settings and practice manual trim control exclusively. This discipline significantly improves your flying skills and prepares you for aircraft types with manual trim systems.
Radio Communications Setup
While radio communication doesn’t directly control aircraft movement, proper radio setup is essential for realistic flight operations and demonstrates professional pilot knowledge. Understanding radio frequencies, communication protocols, and ATC interaction enhances flight realism and prepares you for actual aviation environments.
Radio frequency setup begins before engine start. Research your departure airport’s ATIS (Automatic Terminal Information Service) frequency, obtain current weather and airport information, and note the active runway. This pre-flight preparation mirrors real-world pilot operations and ensures you’re prepared for departure.
Ground frequency contact initiates your flight. Contact ground control when ready for engine start, request permission to start engines, and receive taxi clearance. During taxi, follow ground control instructions precisely, maintaining proper radio phraseology and confirming all clearances. This practice develops genuine communication skills applicable to real-world flying.
Tower frequency contact occurs when requesting takeoff clearance. Establish contact with tower control, confirm your aircraft type and runway, and receive takeoff clearance with specific runway assignment and departure instructions. During takeoff, maintain tower frequency and report when airborne. Proper radio technique demonstrates professionalism and develops skills essential for actual pilot certification.
En-route frequency management involves contact with departure control, center controllers, and approach control as you progress toward your destination. Each controller transition requires brief position reports and level confirmations. Maintaining proper radio discipline throughout your flight creates realistic scenarios and develops genuine communication proficiency.
Approach frequency contact occurs when descending toward your destination. Report your position, altitude, and requested approach procedure. Approach control provides radar vectors to align you with the runway, descent clearances, and approach clearance when established on the final approach course.
For comprehensive travel preparation information, review our resources on best airlines for long flights, which includes information about airline operations and crew procedures you’ll observe during actual commercial flights.
Troubleshooting Common Control Issues
Even experienced simulator pilots encounter control-related challenges. Understanding common issues and their solutions prevents frustration and maintains flight quality. Most control problems stem from calibration issues, incorrect settings, or hardware limitations rather than fundamental control technique problems.
Control drift—where the aircraft gradually deviates from desired flight paths without control input—typically indicates calibration problems. Access your simulator’s calibration menu and re-establish neutral positions for all control axes. Ensure your hardware is positioned on a stable, level surface and that no external factors affect sensor readings.
Oversensitive controls that respond excessively to small stick movements usually result from excessive sensitivity settings or poor calibration. Reduce control sensitivity in your simulator settings, typically starting at 50-60% and adjusting based on feel. Some hardware manufacturers provide sensitivity adjustment in their own control software, offering additional fine-tuning options.
Unresponsive controls that seem to require excessive input to produce noticeable aircraft movement often indicate insufficient sensitivity or dead zone settings that are too large. Increase sensitivity gradually while monitoring aircraft response. Reduce dead zones only if control drift doesn’t worsen.
Pitch trim that doesn’t seem to affect aircraft attitude usually indicates the trim system is disabled or set to automatic mode. Check your simulator settings to ensure manual trim is active and automatic trim features are disabled. Verify that trim inputs are mapped to appropriate hardware controls.
Flap extension that doesn’t produce expected performance changes might indicate flap damage or incorrect flap configuration for your aircraft. Some aircraft require specific flap lever positions for various configurations. Consult your aircraft manual or documentation to confirm proper flap extension procedures.
Radio communication problems often stem from incorrect frequency entry or radio tuning. Double-check frequency numbers, ensure proper decimal placement, and verify that your radio is set to active frequency rather than standby frequency. Some simulators require explicit frequency swap commands to activate standby frequencies.
For additional information about realistic flight operations, explore our Sky Voyage Hub Blog for comprehensive aviation content and travel insights.
FAQ
What’s the best control setup for flight simulator beginners?
Beginners benefit most from yoke-based control systems that provide intuitive pitch and roll inputs. Add a basic throttle quadrant with separate throttle control, then progress to propeller pitch and mixture controls as skills develop. Quality matters more than complexity—invest in a reliable, well-calibrated system rather than overwhelming yourself with excessive features.
How long does it take to master flight simulator controls?
Basic proficiency develops within 20-30 hours of dedicated practice. Advanced skills including complex aircraft operations and realistic approach procedures require 50-100+ hours. True mastery—where controls feel natural and you execute procedures without conscious thought—typically takes 100-200+ hours depending on your learning pace and practice frequency.
Should I use autopilot during flight simulator training?
Use autopilot strategically. During initial learning phases, hand-fly all maneuvers to develop fundamental control skills. Once comfortable with basic operations, use autopilot for cruise phases during long flights while practicing manual approaches and landings. This balanced approach develops genuine proficiency while reducing training fatigue.
Why does my aircraft feel difficult to control compared to other pilots’ aircraft?
Control difficulty usually stems from improper trim usage or incorrect sensitivity settings. Ensure you’re applying pitch trim to eliminate control pressure requirements. Verify sensitivity settings match your aircraft type and personal preferences. Poor calibration can also affect control feel significantly—recalibrate all axes if problems persist.
Can flight simulator practice prepare me for actual pilot training?
Yes, quality flight simulator practice provides valuable preparation for actual pilot training. Flight schools recognize simulator time as legitimate training credit. Focus on realistic procedures, proper radio technique, and systematic aircraft management to maximize training value. Many commercial pilots credit simulator practice with accelerating their actual flight training progress.
What external resources help improve flight simulator skills?
Consult official aircraft manuals for your simulated aircraft type, available from manufacturers like Boeing and Airbus. Review resources from Federal Aviation Administration including pilot handbooks and practical test standards. Check community resources like flight simulation forums and YouTube channels dedicated to realistic flight operations for technique demonstrations and troubleshooting assistance.
Last updated: 2024. This guide reflects current flight simulator software capabilities and realistic aviation procedures. Specific features vary by simulator platform—verify procedures for your particular software.