Table of Contents
Introduction
In today’s fast-paced world, safety and convenience are paramount when it comes to driving. Have you ever found yourself struggling to reverse your car in a tight parking spot or worrying about unseen obstacles behind your vehicle? Installing a car backup camera offers a modern, effective solution to these common concerns. This technology significantly enhances rearview visibility, providing drivers with increased confidence and reducing the risk of accidents during reversing maneuvers.
The importance of installing a reliable backup camera cannot be overstated. According to the National Highway Traffic Safety Administration, rearview cameras can reduce backing crashes by nearly 17%, especially in crowded or narrow spaces. With vehicles becoming increasingly sophisticated, backup cameras are now a standard safety feature in many new models. However, for those with older vehicles, adding this feature brings a substantial upgrade. It not only aids in preventing collisions with pedestrians, especially small children, but also protects your vehicle from costly damage.
Understanding the different types of backup cameras available is critical before installation. There are wired systems that offer stable, high-quality video feeds through cable connections and wireless cameras that provide easier installation and flexibility but might be prone to signal interference. Some cameras mount on the license plate, while others integrate into the rearview mirror for discretion and ease of viewing. Learning about these options helps you choose the best solution tailored to your vehicle and preferences.
If you’re eager to install a backup camera yourself, this guide is designed with you in mind. Installing a camera may seem intimidating if you’re unfamiliar with vehicle wiring or electronic components, but with clear instructions and the right tools, it’s quite manageable. You’ll gain a deeper appreciation for vehicle electronics and safety features by walking through the process hands-on. Plus, a DIY installation can save money compared to professional services.
What You’ll Learn in This Guide
This comprehensive guide will walk you through every essential aspect of installing a car backup camera. From the basics to the troubleshooting phase, you’ll have clear, actionable steps to complete the project confidently. Here’s what you’ll learn:
- Understanding Different Types of Backup Cameras: Discover the main types available on the market, including wired and wireless options, as well as various mounting styles. This knowledge helps you make informed choices tailored to your vehicle’s needs and your installation preferences.
- Tools and Preparation Needed for Installation: Get a detailed rundown of the required tools, such as screwdrivers, drills, wire strippers, and electrical tape, alongside preparation tips like battery disconnection and workspace setup. Proper preparation ensures a smoother, safer installation experience.
- Step-by-Step Installation Guide: Follow a thorough procedure covering mounting the camera in the optimal location, routing wiring through the vehicle interior, and connecting power and video wires to the correct circuits safely and effectively. This section is designed to eliminate confusion and guide you through each critical phase with confidence.
- Testing and Troubleshooting: Learn how to verify the camera’s functionality, check video feed quality, align images correctly, and address common issues such as no image display or static. Troubleshooting tips will help you resolve problems quickly, ensuring the camera works as intended.
With the emergence of backup cameras as a popular aftermarket upgrade, this guide aims to empower vehicle owners with knowledge and confidence. By installing a backup camera, you can enhance your vehicle’s safety features significantly and make daily driving more convenient and stress-free.
Following this guide, you will not only become familiar with the camera system but also understand vehicle wiring basics and installation nuances. This knowledge is valuable beyond just this project, as it equips you with skills applicable to other automotive modifications.
Whether you are a seasoned DIY enthusiast or a novice hoping to add a practical feature to your car, this step-by-step approach will support your success. The guide breaks down complex tasks into manageable parts, reducing overwhelm and encouraging a calm, methodical installation process.

Installing a car backup camera significantly improves both safety and convenience for drivers, providing a clear view of what’s behind the vehicle to prevent accidents and ease parking challenges. As we dive deeper into the installation process, understanding the types of backup cameras and preparation essentials is key. From wired to wireless options, and from mounting styles to wiring techniques, being well-informed equips you to tackle your installation project confidently. This discussion will guide you through these crucial aspects to ensure a successful setup of your vehicle’s backup camera system.
Understanding Different Types of Backup Cameras
Backup cameras come in various forms, each with its own advantages and considerations depending on your vehicle type and personal preferences. Knowing the differences in camera technology and installation options will help you choose the right system for your needs. Several types dominate the market today, including wired cameras that connect through cables and wireless options offering more flexible setups.
Wired backup cameras often provide a reliable, interference-free video feed, ideal for vehicles where running cables is feasible. Wireless systems, on the other hand, make installation easier by communicating signals via radio waves, although they may face signal disruptions in certain environments. Additionally, mounting options vary, such as cameras integrated into the license plate frame or attached near the rearview mirror display, impacting the field of view and installation complexity.
Key Aspects of Backup Camera Types
Understanding the main features and installation implications of each camera type can clarify your decision-making process. Consider the following when evaluating options:
- Wired Backup Cameras: These provide consistent video quality with a direct cable connection to the display unit, minimizing interference. However, installation may require more vehicle disassembly to route cables properly and securely.
- Wireless Backup Cameras: Known for easier and faster setup, they avoid the complexity of running wires through the vehicle. Signal interference or limited transmission range can sometimes affect performance, so placement and frequency are important considerations.
- License Plate vs Rearview Mirror Cameras: License plate cameras offer a direct rear view and generally straightforward mounting. Rearview mirror cameras replace or attach to the existing mirror, providing a convenient display location but may require additional wiring or adapter kits.
- Compatibility and Features: Some cameras come with night vision, wide-angle lenses, or waterproof designs. Matching camera capabilities to your vehicle’s needs and environment helps ensure optimal performance and durability.
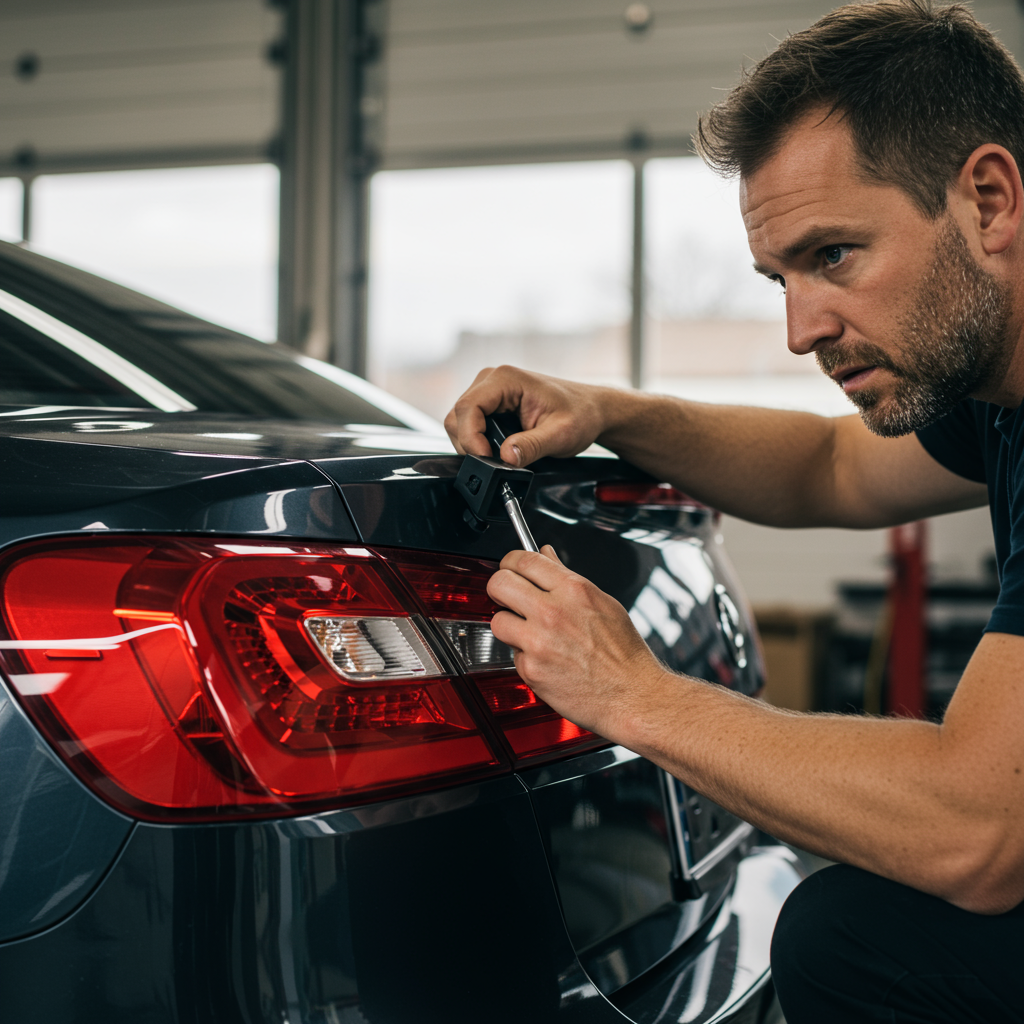
Tools and Preparation Needed for Installation
Having the proper tools and preparation steps completed before starting the camera installation is essential to avoid delays or mistakes. Gathering the right equipment and understanding the vehicle’s wiring layout reduces frustration and promotes a smooth workflow. Preparation also includes safety precautions that protect both you and your vehicle’s electrical system.
Familiarizing yourself with the installation process through manuals or guides beforehand will reduce trial-and-error. Double-checking the camera kit contents along with the workspace setup helps establish an efficient, organized environment. Disconnecting the vehicle battery is a critical safety step to prevent electrical shorts or shocks during wiring.
Important Considerations for Installation Preparation
Before mounting the hardware and running wires, keep these preparation points in mind:
- Required Tools: Essential tools typically include screwdrivers for mounting screws, a drill for creating access holes, wire strippers to prepare cables, electrical tape for insulation, and possibly a multimeter to test electrical connections. Having these ready ensures you can work methodically without interruption.
- Vehicle Manual Review: The vehicle’s manual provides guidance on fuse box locations, wire colors, and electrical system layout. Understanding these details simplifies routing power wires and connecting to the reverse light circuit.
- Battery Disconnection: To ensure safety and avoid damaging the vehicle’s electrical components, disconnect the negative terminal of the battery before beginning the installation. This precaution prevents accidental short circuits and protects sensitive electronics.
- Workspace Setup: Installing the camera requires parking in a well-lit, spacious area with access to tools and possibly an assistant. A clean, flat surface helps keep components organized and reduces risk of losing small parts.

Conclusion
Installing a car backup camera is a practical and valuable upgrade that significantly enhances your vehicle’s safety and convenience. This guide has detailed the essential types of cameras available, including wired and wireless systems, each offering unique benefits to suit various vehicle setups and user preferences. Wired backup cameras provide a reliable, interference-free video feed ideal for those comfortable with intricate wiring. In contrast, wireless models simplify installation with greater flexibility, though with potential signal limitations. Additionally, mounting options such as license plate frames or rearview mirrors provide customizable placement tailored to your needs.
Preparation and the right tools are crucial for a smooth installation. Equipping yourself with basic tools such as screwdrivers, drills, wire strippers, and electrical tape, combined with thorough pre-installation checks like disconnecting the battery and reviewing your vehicle’s manual, help prevent common pitfalls. These steps not only ensure your safety but also protect your car’s electrical system throughout the process. The installation itself encompasses careful mounting of the camera, secure routing of cables within the vehicle’s interior, and precise wiring connections to the reverse light circuit and display unit. Attention to detail during each phase minimizes risks of damage and maximizes camera performance.
Once installed, it’s important to rigorously test the car backup camera to verify the video feed is clear and the image alignment is correct. Troubleshooting common issues such as static interference, no video display, or improper power supply can often be resolved with simple adjustments described in this guide. Following successful testing, regular maintenance—like cleaning the camera lens and protecting wiring from wear—will keep your system reliable in the long term. Knowing when to call a professional can save time and avoid frustration, especially if complex electrical repairs or persistent malfunctions arise.
To move forward confidently, gather all your tools and camera components, review your vehicle’s wiring diagram carefully, and plan your workspace with ample light and organization. Taking a methodical approach will empower you to complete the installation without rush or confusion. Remember, safety first—always disconnect the battery before working on electrical connections. After installation, integrate routine checks and cleaning habits to maintain optimal camera condition and visibility. This not only preserves your investment but also enhances your driving safety day after day.
In summary, installing a car backup camera yourself can be a rewarding DIY project that improves your vehicle’s functionality and your peace of mind. It opens a window into your car’s rear view like never before, helping you avoid accidents and park with greater precision. By understanding the types, tools, steps, and maintenance involved, you gain more than just a new gadget—you acquire practical skills that can serve in future automotive projects. Embrace this upgrade with confidence, knowing that each step you take contributes to a safer and more enjoyable driving experience.


